最近看一个app的源码,发现基本没有用第三方的开源组件,但是特效也做得不错,总结一下实现的思路
简单的抽屉效果
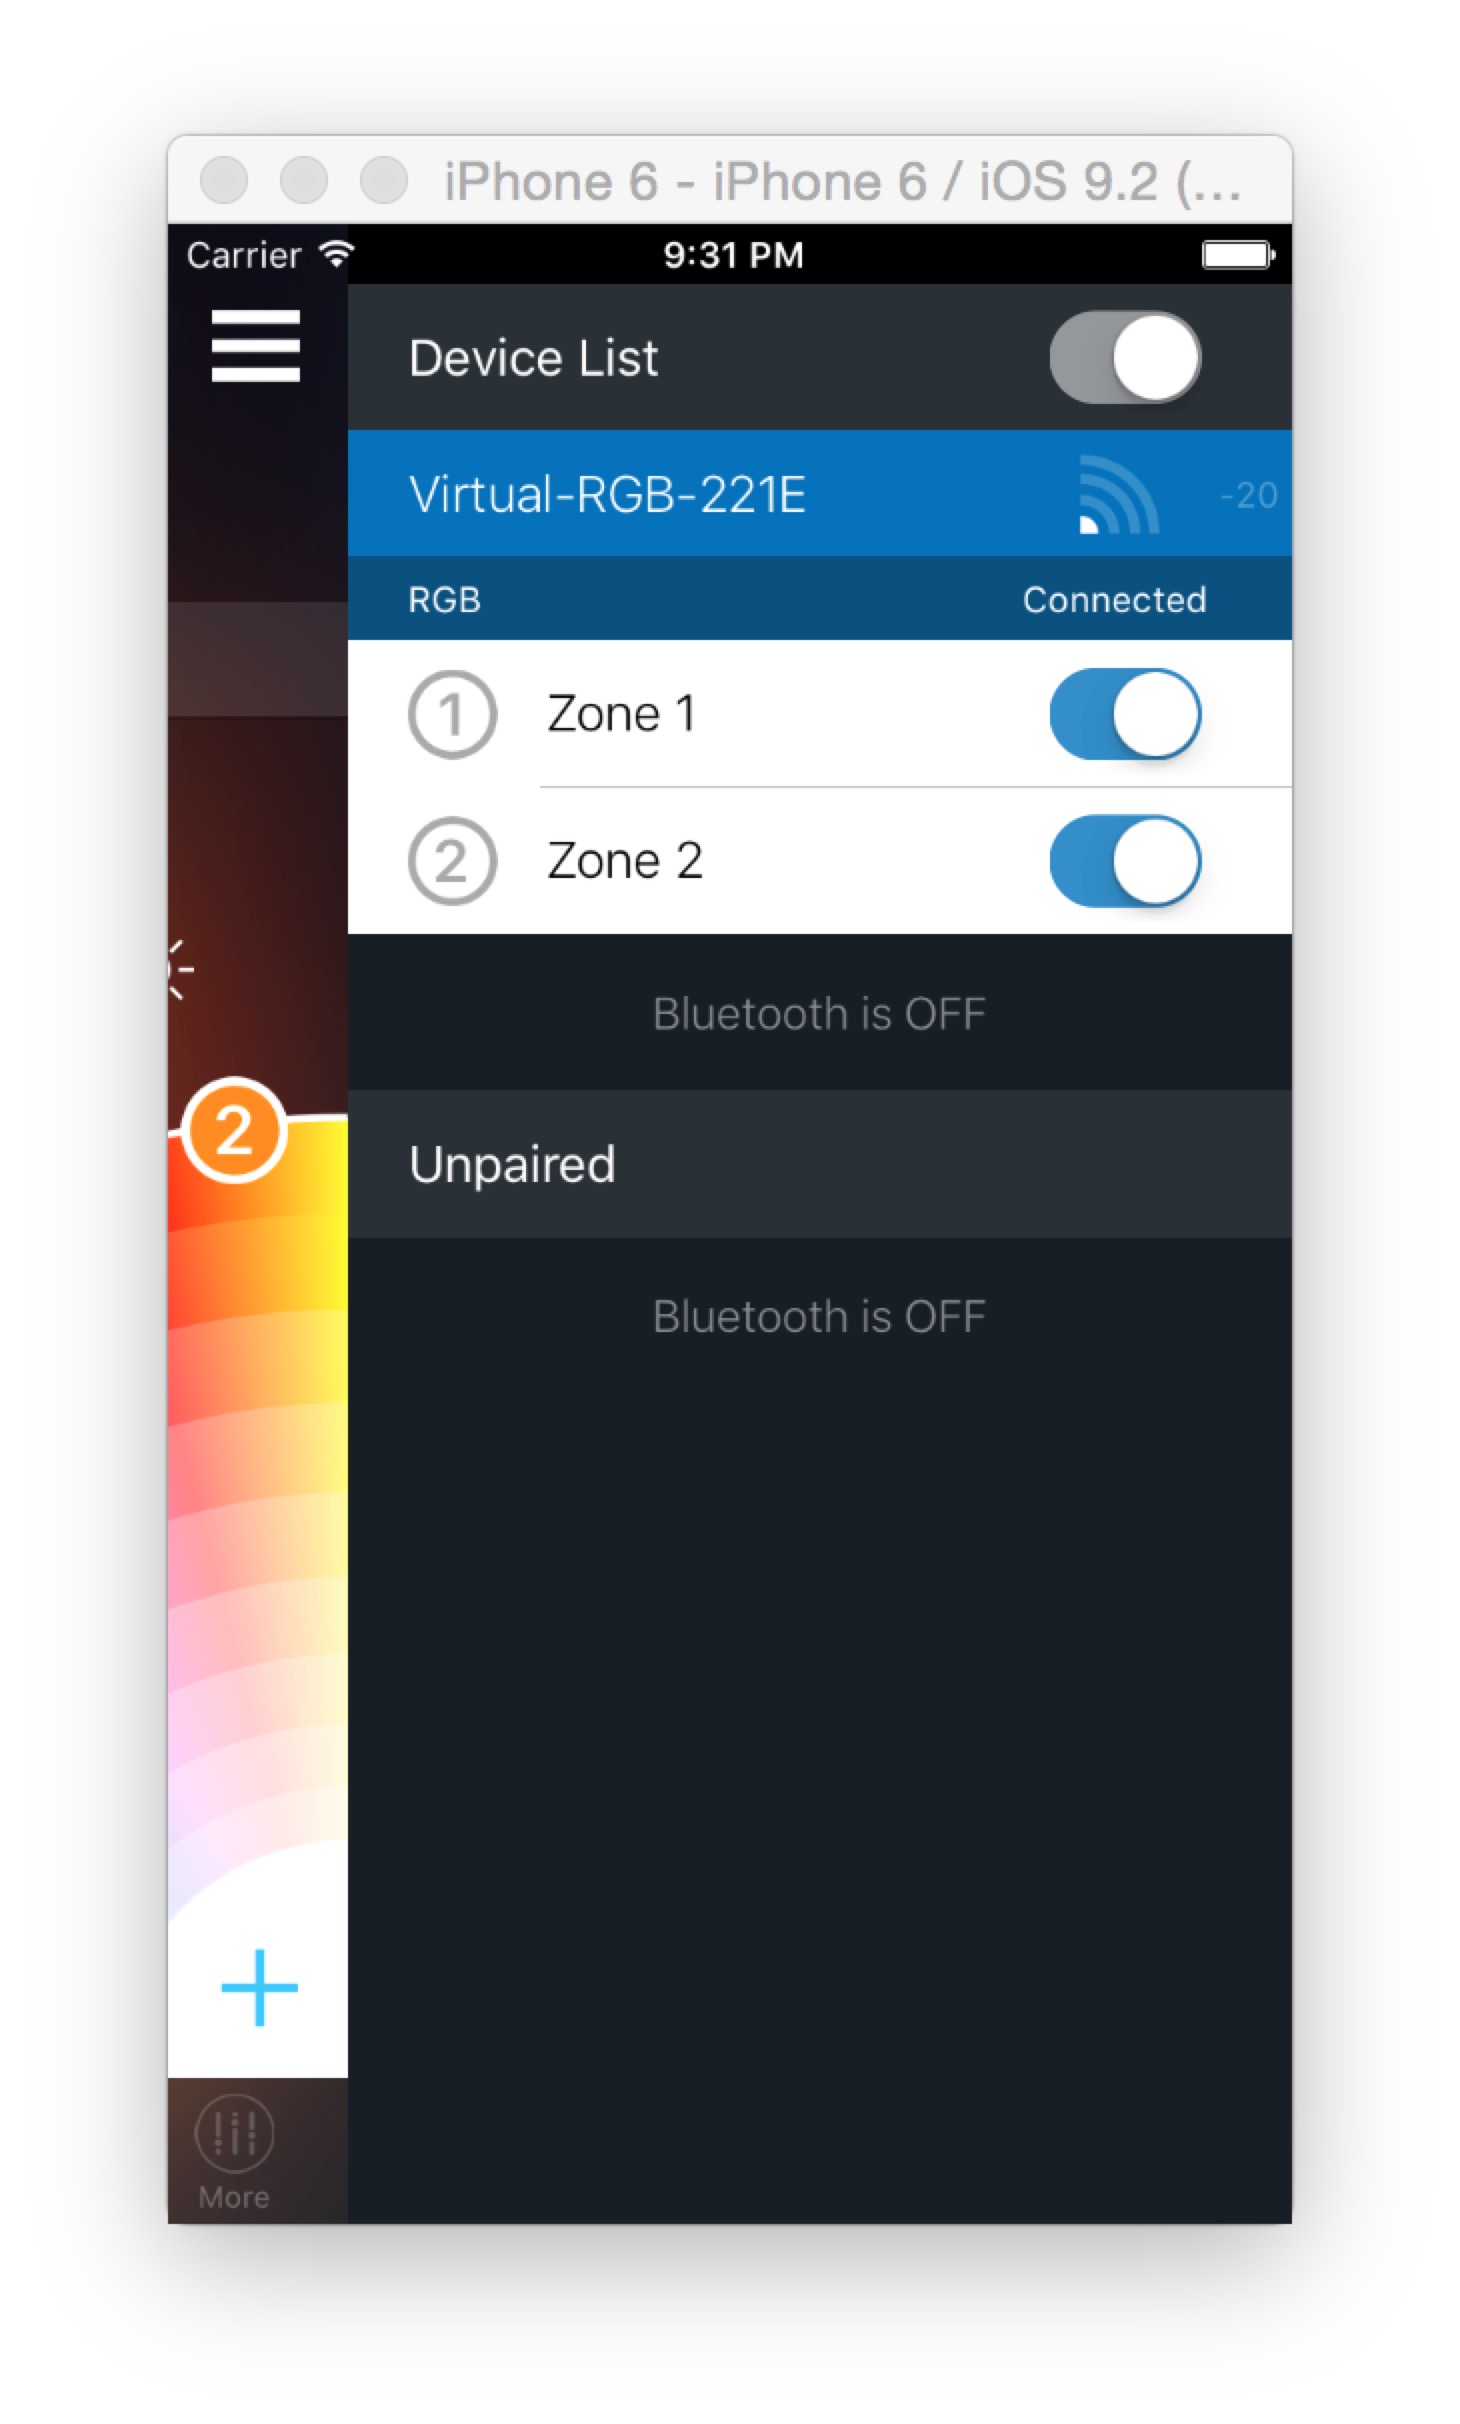
效果如图:

这种抽屉效果很常见,开源组件也很多。但是一般开源组件都对Controller的结构有要求,有时候不是很方便。
原理主要是:主页面加侧边栏。当弹出侧边栏时,设置主页面的x为一个负数;当收回侧边栏时,将主页面的x设置为0。再加上一些动画和手势就可以了。
初始化侧边栏
1
2
3
4
5
6
7
8
9
10
11
12
13
| func addSidePanelController() {
if (sidePanelController == nil) {
sidePanelController = UIStoryboard.deviceListPanelController() // 初始化侧边栏的controller,用storyboard或者代码不是核心
view.insertSubview(sidePanelController!.view, atIndex: 0) // 添加侧边栏view
sidePanelController!.view.frame = CGRectMake(
expandedOffset,
topLayoutGuide.length,
view.bounds.width - expandedOffset,
view.bounds.height - topLayoutGuide.length) // 设置侧边栏frame
addChildViewController(sidePanelController!) // 添加侧边栏controller为子controller
sidePanelController!.didMoveToParentViewController(self)
}
}
|
处理弹出和收回
1
2
3
4
5
6
7
8
9
10
11
12
13
14
15
16
17
18
19
20
21
22
23
24
25
26
27
28
29
30
31
32
| func animatePanel(shouldExpand shouldExpand: Bool) {
// 侧边栏展开时,主页面的x设置为一个负值
if (shouldExpand) {
deviceListExpanded = true
animateCenterPanelXPosition(targetPosition:
-CGRectGetWidth(mainTabController.view.frame) + expandedOffset) { _ in
self.mainTabController.childViewEnabled = false // 弹出侧边栏,主页面不响应用户点击
}
} else {
// 侧边栏收回时,主页面的x设置为0
animateCenterPanelXPosition(targetPosition: 0) { _ in
self.deviceListExpanded = false
self.sidePanelController!.view.removeFromSuperview()
self.sidePanelController = nil
self.mainTabController.childViewEnabled = true // 收回侧边栏,主页面可响应用户点击
}
}
}
func animateCenterPanelXPosition(targetPosition targetPosition: CGFloat, completion: ((Bool) -> Void)! = nil) {
UIView.animateWithDuration(0.5,
delay: 0,
usingSpringWithDamping: 0.8,
initialSpringVelocity: 0,
options: .CurveEaseInOut,
animations: {
self.mainTabController.view.frame.origin.x = targetPosition // 这行是核心
}, completion: completion)
}
|
UITableView行展开效果
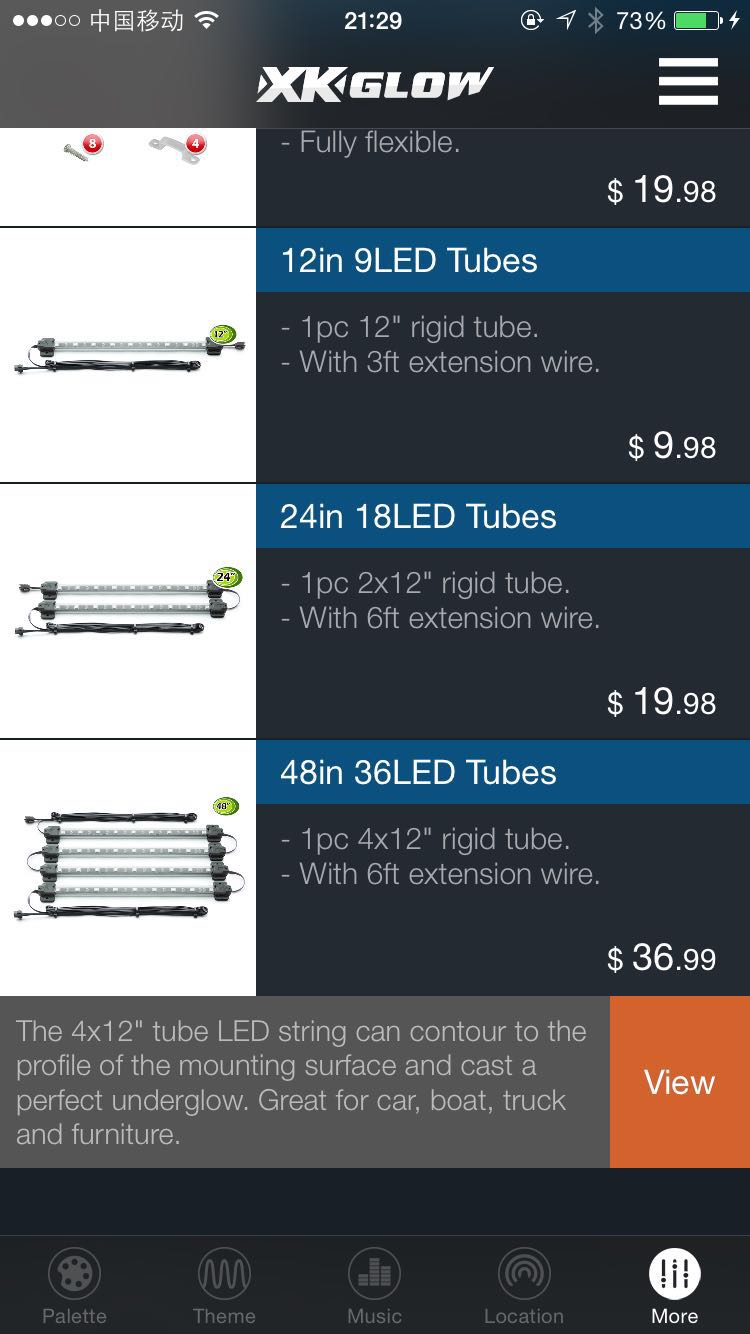
效果如图:

这个效果的原理也很简单,不展开的时候row height是某个值,展开后是另一个值,在select row的时候做一个动画就可以了
1
2
3
4
5
6
7
8
9
10
11
12
13
14
15
16
17
18
19
20
21
22
23
| override func tableView(tableView: UITableView, heightForRowAtIndexPath indexPath: NSIndexPath) -> CGFloat {
if (indexPath == tableView.indexPathForSelectedRow) {
return Compatibility.ProductCellHeight + 87
} else {
return Compatibility.ProductCellHeight
}
}
override func tableView(tableView: UITableView, didSelectRowAtIndexPath indexPath: NSIndexPath) {
// recalculate row height
tableView.beginUpdates()
tableView.endUpdates()
}
override func tableView(tableView: UITableView, willSelectRowAtIndexPath indexPath: NSIndexPath) -> NSIndexPath? {
if indexPath == tableView.indexPathForSelectedRow {
tableView.deselectRowAtIndexPath(indexPath, animated: true)
tableView.beginUpdates()
tableView.endUpdates()
return nil
}
return indexPath
}
|
隐藏static cell的某个section
总的来说,对于设置为static cell的UITableView,要想动态地隐藏部分section,通过heightForXXX没有用。即使设置成0,还是会出现在界面上,只是会挤压在一起
正确的做法是,用numberOfRows方法隐藏row,用titleForHeader和titleForFooter方法隐藏header和footer
1
2
3
4
5
6
7
8
9
10
11
12
13
14
15
16
17
18
19
20
21
22
23
24
25
26
| override func tableView(tableView: UITableView, numberOfRowsInSection section: Int) -> Int {
if (section == monoPickerSection && hideMonoPicker) {
return 0
}
return super.tableView(tableView, numberOfRowsInSection: section)
}
override func tableView(tableView: UITableView, titleForHeaderInSection section: Int) -> String? {
if (section == monoPickerSection && hideMonoPicker) {
return nil
}
return super.tableView(tableView, titleForHeaderInSection: section)
}
override func tableView(tableView: UITableView, titleForFooterInSection section: Int) -> String? {
if (section == monoPickerSection && hideMonoPicker) {
return nil
}
return super.tableView(tableView, titleForFooterInSection: section)
}
|


